In order to print ColorFabb XT-CF20, which is extremely abrasive and requires high temperatures (some users mention temperautres up to 260 degrees Celsius), the standard hotend from Anycubic won’t do. The standard hotend comes with PTFE tubing in the heat break, which can deteriorate at high temperatures (250+ degrees Celsius) and develop toxic fumes. This is why I undertook a switch to the all metall E3D-V6 hotend (1.75 mm, Bowden, 12 V) combined with a Nozzle-X nozzle and a Titanium heat break.

First, I tried to just replace the heat break with a chinese clone, which did not work well. When I inserted the filament it got stuck in the heat break almost immediately. Once I got it out again, I demounted the hotend and found the problem: the inside of the heat break was extremely rough and uneven. I tried to drill it out and ream it, but the bore remained rough.
So the real deal it is!
On the E3D website, a very comprehensive wiki on the assembly of the hotend can be found.
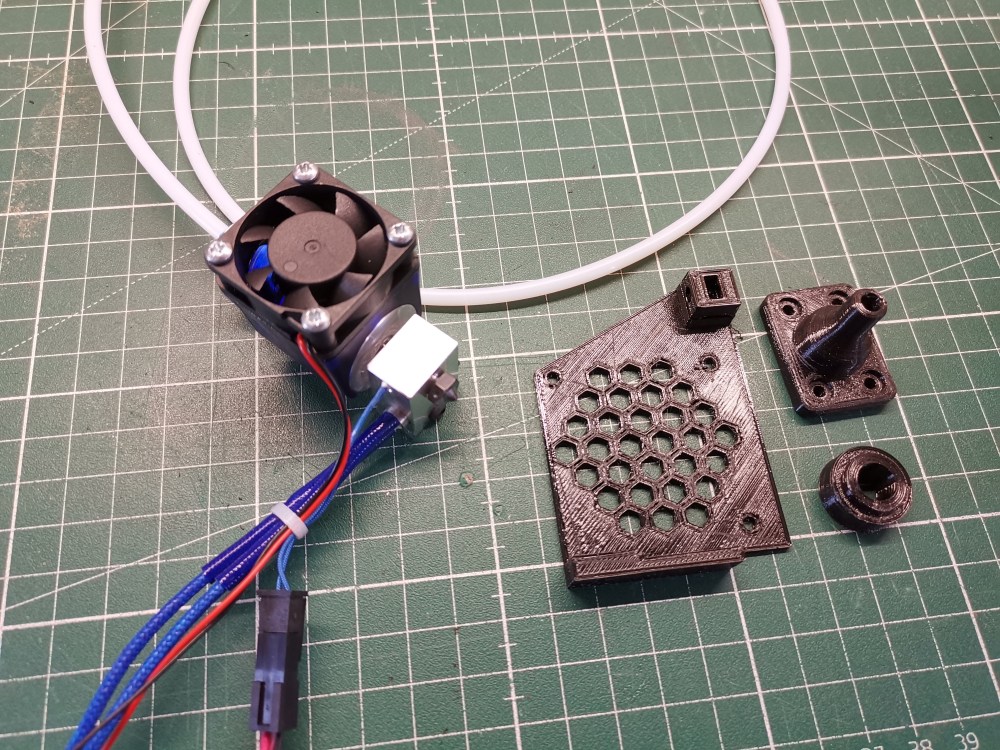
Before you start disassembling the 3D printer, make sure to print the one (three) part(s) required for the upgrade (ended up using the spacer from here instead, to accomodate the Bowden clip and did not use the Bowden support, because I did not find the right length screws to fit it). The accompanying video explaining the conversion is a bit shaky and therefore hard to watch. What they recommend, is to cut off the connectors from the original hotend and solder them onto the new one. Instead, I decided to crimp some new connectors on the new hotend. The fans use JST PH 2.0mm 2 pin connectors and the hotend uses a JST XH 2.5mm 2 pin connector.
For the mounting of the new hotend, almost all the necessary screws can be taken from the old assembly, except the screws for mounting the actual hotend, which requires 4 x M3 x 25 mm (since I did not find any, I used 4 x M3 x 20 screws and did not put the Bowden support).
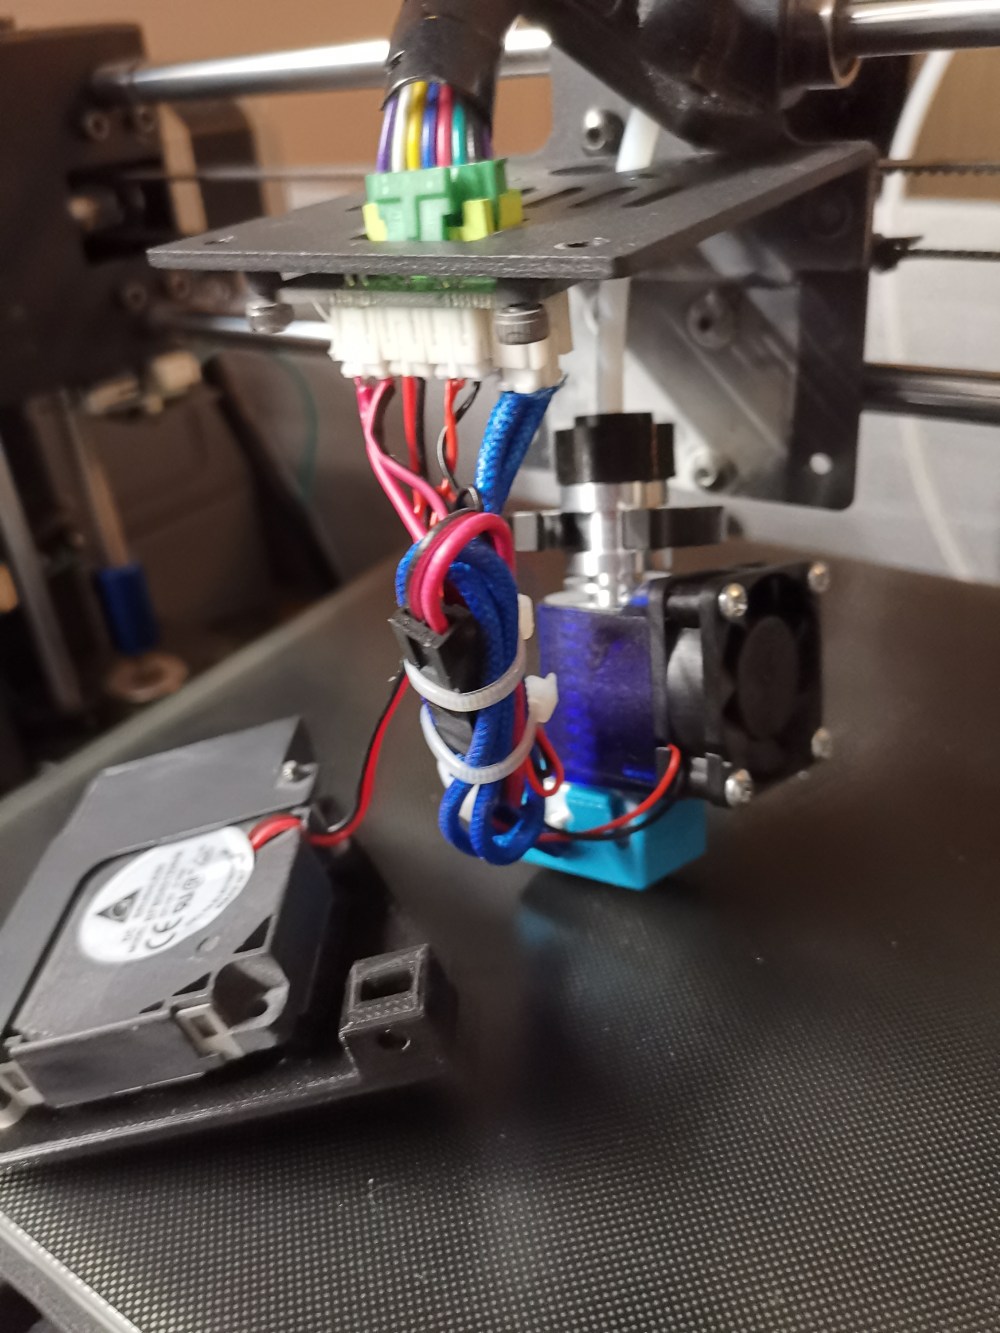
Once all the cables have been done I tested the new hotend. I mounted it provisorily and heat up to PLA temperature. No magic blue smoke, all good.
-
Final mounting of the hotend
Before tuning the PID and setting up everything for the new hotend (Semitec 104GT2 thermistor), I downloaded the latest firmware (Marlin 1.19 at the time of writing). In the wiki for the assembly, they recommend to change the thermistor (define TEMP_SENSOR_0 5) and the minimum temperature (HEATER_0_MINTEMP 5) to detect bad wiring in the Configuration.h file. Both were already adjusted in this latest firmware.
If you are using the stock drivers (like I am) all directions are inverted in the latest firmare on all the drivers (lines 857 to line 865 in the Configuration.h file), which is easily fixed by changing false to true and viceversa.
To flash new firmware, drivers are required, which can be downloaded from the anycubic website. Also, since I did not have an octoprint setup, I attempted to flash the firmware with Cura (Version 2.3.1, Mac). However, Cura would not find the printer.
Here I found, that a simple file edit can fix this:
In the directory
/Applications/Cura.app/Contents/Resources/plugins/plugins/USBPrinting
in the file
USBPrinterOutputDeviceManager.py
the line:
result = self.getSerialPortList(only_list_usb = True)
must be changed to
result = self.getSerialPortList(only_list_usb = False)
which fixed the connection issue for me.
Now when starting Cura, it would connect to the printer. However, when I flashed the firmware, it would say:
Firmware update failed due to an unknown error.
but would continue loading. It was only after I flashed the again the original firmware from anycubic, that I realized, that the beeb sound had been gone before, and the firmware was actually successfully flashed. So I flashed the new firmare again (and it would still show me the error).
In the git repository, they recommend to send some additonal GCode:
M502 – factory reset
and
M500 – save settings
I used pronterface for that.
The new hotend should be properly tuned, see this wiki for detailed instruction:
M103 S50 – turn on part cooling fan to approximately 20 % (S in the range 0 – 255). It seems to have trouble to spin up below this. But no problems, for lower speeds, once started.
M303 E0 S210 C10 U1 – autotune the PID at 210 degrees Celsius by heating up 10 times.
M304 – turn off part cooling fan, once done
M500 – save settings
Now I heated up the hotend to 285 degrees Celsius and tightened the nozzle (I did that in pronterface).
Mount everything on the 3D printer.
Run PID tuning again with silicone sleeve and run PID tuning for heated bed:
M303 E-1 S60 C6 U1 – autotune heated bed PID with 6 cycles
M500 – save settings
Manually level bed.
Test bed leveling:
G28 – Z-Homing
G26 C H215 B75 P5 R25 Q2 Z2 – calibration print
H – hotend temperature, B – bed temperature, Q – retration length in mm, Z – unretraction length in mm
Calibration print fails absolutely horribly.
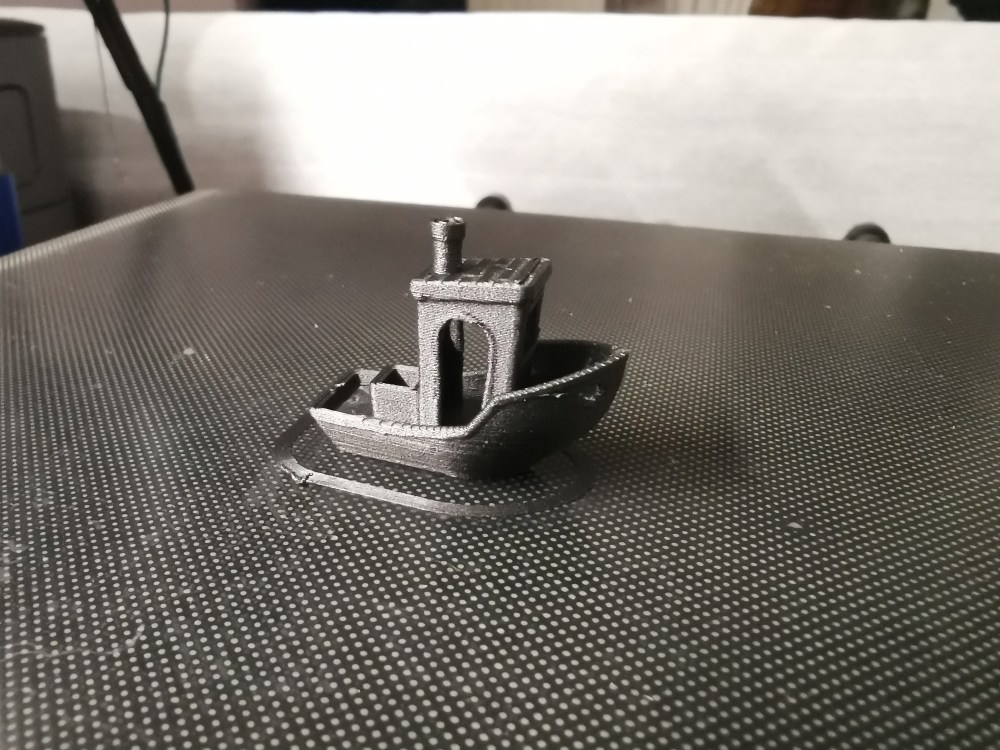
Dial the new hotend in with 3Dbenchy’s.
Turns out, that hotend gets shorter when hot. Therefore, manual calibration at temberature of hotend and bed. Still needed to dial in the materials, because they behave differently with this new setup.
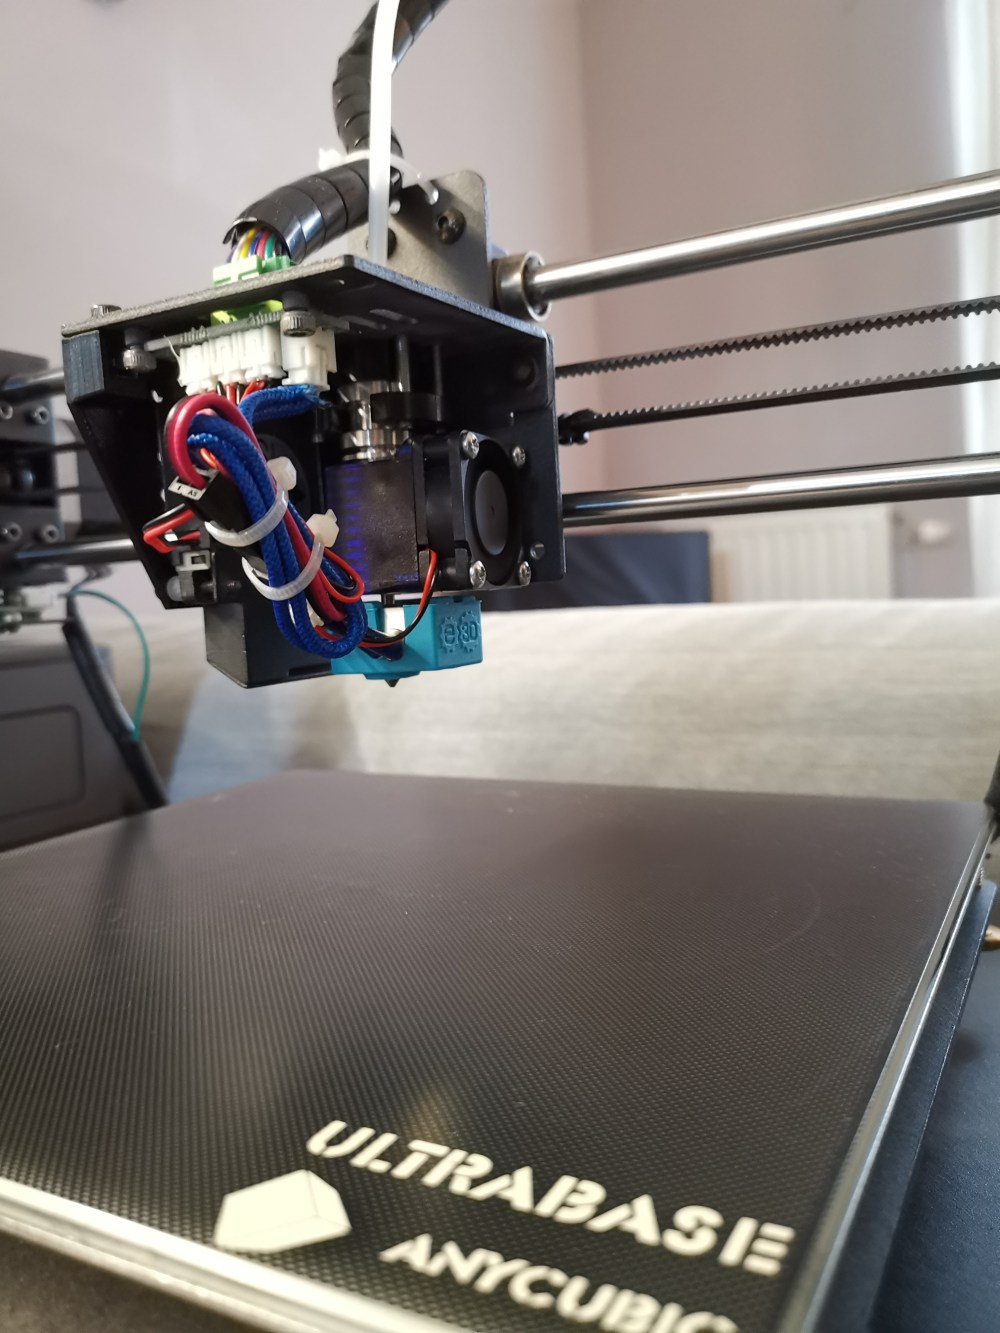
New hotend mounted and functional 🙂

Thank you!!!! This was exactly what I was looking for. I am interested in printing nylon for a nerf blaster project and I knew some Hackery would be needed. I will consider your experience. Are you satisfied with this modification?
LikeLike
Hi Tom,
the modification has been working very well. However, expect considerable wear on the nozzle, especially, if you print with abrasive materials. Good luck with your modification!
LikeLike
I had pretty much the same situation with Chinese clones and e3d v6, and your tutorial has helped me a lot! I would also suggest, that it’s not necessary to print custom spare parts first if you are only going to print PLA. You can just remove a part cooling fan completely. This might be helpful for somebody who already had a hotend broken (like me) and can not print anything.
LikeLike